Kubernetes is a free open source tool created by Google that helps to manage and scale up containerized applications. It has the ability to automatically terminates non responding containers, restart containers, provide load balancer capabilities, helping developers achieve a high availability and fault tolerant ability for their apps.
When trying to learn it through kubernetes website things can get overwhelming as you will be bombarded with so many terms. It is a tool which has a tonnes of great features and can be tough to get a grip, this guide gives a glimpse into launching a simple nodejs app and shows how easy it is to scale up and down the application on a node.
I tried this on my Macbook with following requirements:
Requirements:
- minikube - For creating cluster to help run kubernetes locally how to install
- kubectl - Kubernetes command line toolhow to install
- docker - A basic knowledge of using docker to create containers will be helpful in understanding how kubernetes works.
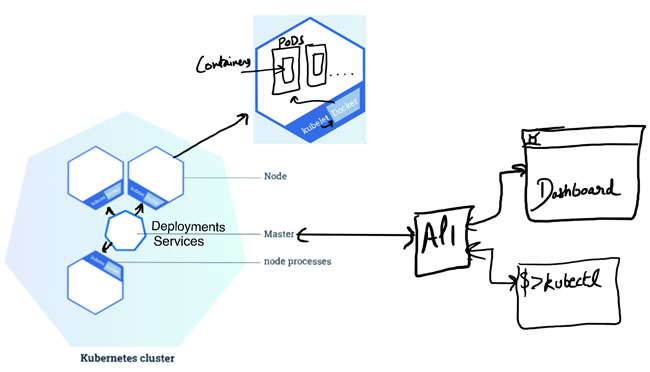
Some kubernetes Terminology
- Master: It manages the cluster and all activities inside cluster like managing the deployments of applications containers, scheduling applications, scaling up and down, rolling out new updates.
- Cluster: clusters which is like a group of computers acting as one
- Node: It is the worker machine just like a VM in the cluster where we will be running our containers
- Kubelet: It takes care of the node registration inside the cluster and watches for any work assignments for launching new containers from Master
- Container Engine: Talks with Kubelet and creates & manges containers
- Pods: When we deploy our app inside a node it is run inside containers which are contained in a Pod which runs and keeps same types of container together.
- Containers: Our container where the application sits.
- Kube proxy: Forwards app user requests to right containers.
Our demo nodejs app
server.js
Running on port 8080, returning a page with response Hello World.
var http = require('http');

var handleRequest = function(request, response) {
  console.log('Received request for URL: ' + request.url);
  response.writeHead(200);
  response.end('Hello World!');
};
var www = http.createServer(handleRequest);
www.listen(8080);
Dockerfile
FROM node:6.14.2
EXPOSE 8080
COPY server.js .
CMD node server.js
Creating a cluster and deploying app
kubectl
Assuming we have kubectl installed we have now ability to manage clusters that we will be creating in the next steps with help of minikube. Run the following command to ensure we have
kubectl version
Creating a cluster with minikube
minikube startThis will create a cluster called minicube, we can also create a cluster with name by adding to the above command -p <name>.
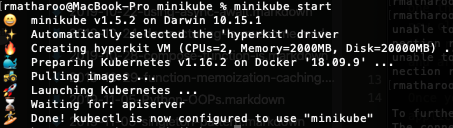
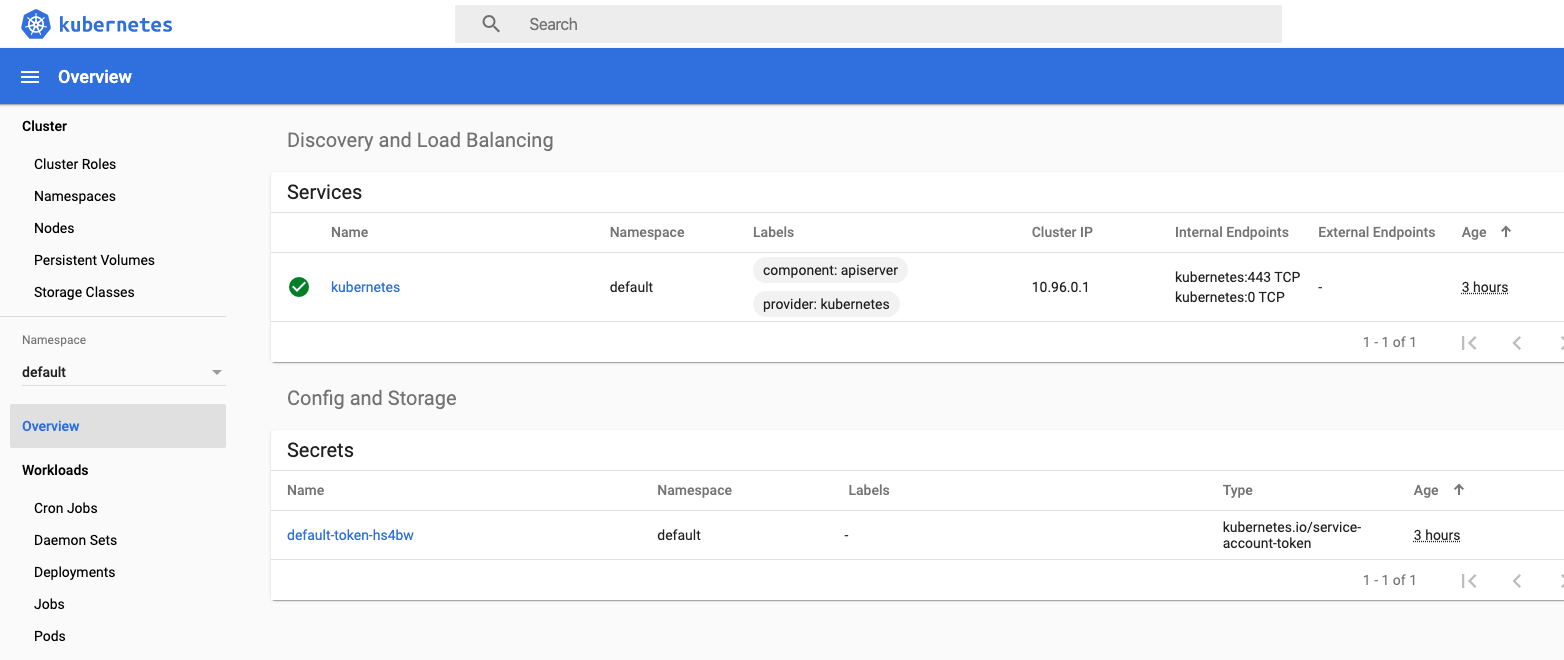
Now to view the cluster in kubernetes dashboard
minikube dashboard
Build and run our app on a cluster
After our minicube cluster is ready as seen in dashboard, we can now build our app.
building docker image
Run the following command to change to our minikube docker daemon
eval $(minikube docker-env)Assuming we are in our project directory with server.js and Docker file, we can now run :
docker build -t hello-app1 .This will build up an image of our application which we will use to deploy to our kubernetes cluster.
Deployment and Services
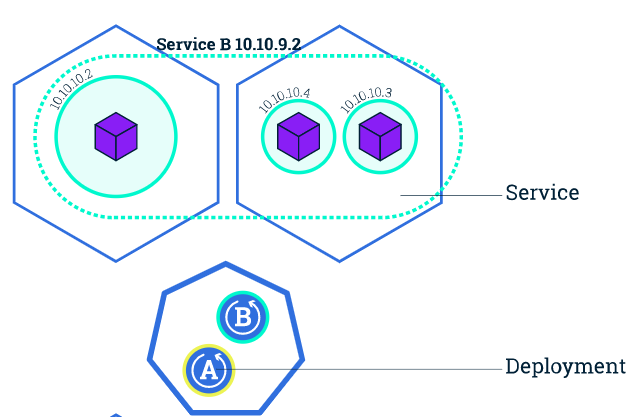
To deploy app to a kubernetes cluster we will create a yaml file which will specify two object types called a Deployment and a Service
- Deployment - It will create a pod with containers built using the docker image we created above. We will also be specifying a minimum number of containers our app needs which is how it will scale up and down. We can then also control the scaling from the dashboard itself.
- Services - This will ensure networking is setup within the cluster so that we can expose our app containers to outside world with external ips. For the configuration I have used type as LoadBalancer which will work with AWS or GCK as they will automatically provision external ips.
hello-app1.yaml
1
2
3
4
5
6
7
8
9
10
11
12
13
14
15
16
17
18
19
20
21
22
23
24
25
26
27
28
29
30
31
32
apiVersion: v1
kind: Service
metadata:
  name: hello-app1
spec:
  type: LoadBalancer
  ports:
  - port: 8080
    targetPort: 8080
  selector:
    app: hello-app1
---
apiVersion: apps/v1
kind: Deployment
metadata:
  name: hello-app1
spec:
  replicas: 3
  selector:
    matchLabels:
      app: hello-app1
  template:
    metadata:
      labels:
        app: hello-app1
    spec:
      containers:
      - name: hello-app1
        image: hello-app1
        ports:
        - containerPort: 8080
        imagePullPolicy: IfNotPresent
- Service settings for networking:
- line7: we specify what
portof our node is exposed to outside world andtargetPortwhich is the apps exposed port.
- line7: we specify what
- Deployment settings for starting containers:
- line18: specifies the minimum number of containers replicas we want to launch, for this example i have set it to 3. So when we deploy our app, it will create 3 pods with containers.
- line32:
imagePullPolicy: IfNotPresentwhich ensures that we are picking up the images stored on our minikube local docker, as we have not push the image to docker registry. It can be changed toAlwaysif you want your app image to be pulled from a docker registry.
Now to deploy our app run:
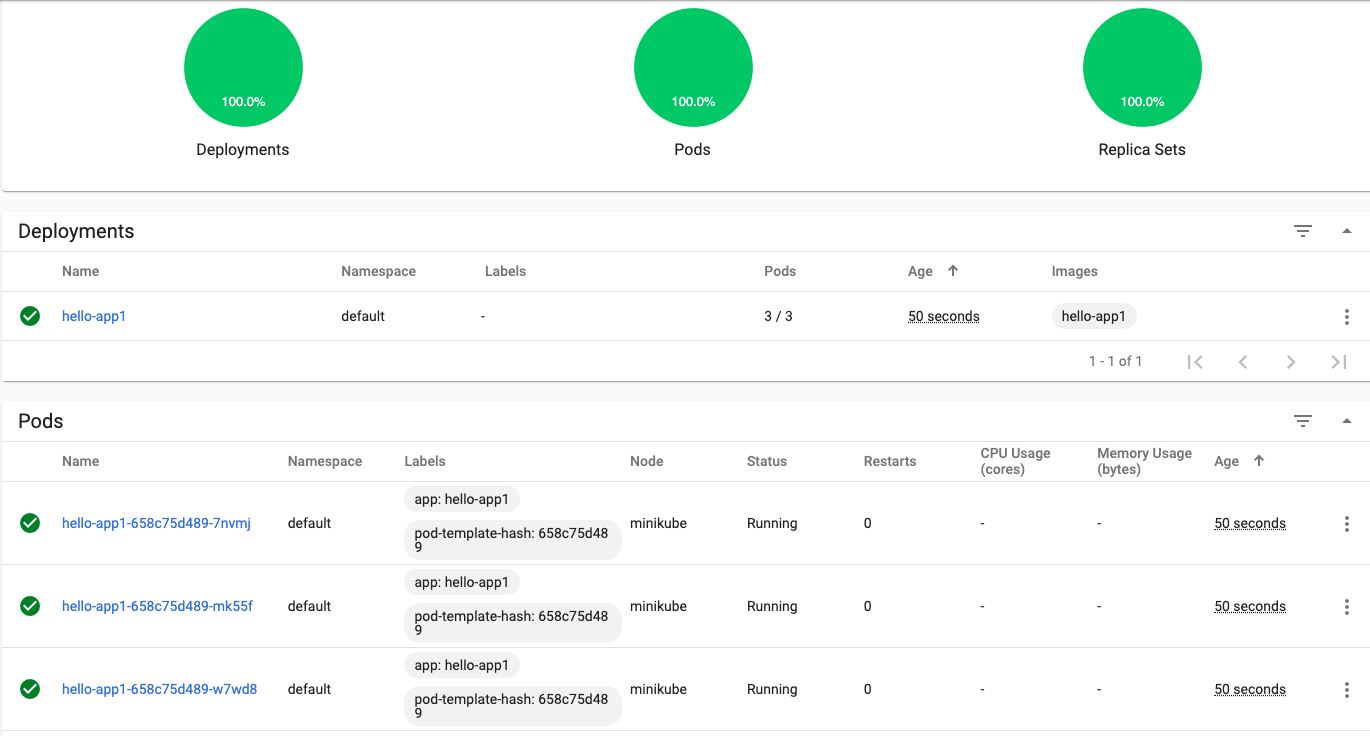
kubectl apply -f hello-app1.yamlThis will create a node and spin up app containers in pods inside the node.
Similarly we can build different app images and deploy to our node.
Deleting deployment and service
To remove our app deployment just run the following:
kubectl delete service hello-app1
kubectl delete deployment hello-app1
So this is how we can deploy our app to a kubernetes cluster in a node. As of present by default minikube only allows single node deployment for local testing. But there are some workarounds by using virtualization that can help create multiple nodes in a cluster using minikube. Follow link
Full code repo covered in this guide. Click Here