With the complexity surrounding the setup of kubernetes, even starting to setup a simple app can look a daunting task. Heres a simple tutorial for setting up a nodejs application and running it on K8s locally using minikube. Lets get straight into it.
Components involved:
- Node App
- Dockerfile
- Docker Registry
- Kubernetes Deployments, Services, Ingress, Minikube
End Result:
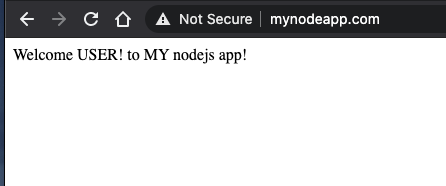
We will be able to acces the application on url http://mynodeapp.com on our localhost.
Our node application
For a simple node application I created an express app with some endpoints like create, delete, and update.
index.js
1
2
3
4
5
6
7
8
9
10
11
12
13
14
15
16
17
18
19
20
21
const express = require("express");
const app = express();

app.listen(3000, function () {
  console.log("listening on 3000");
});

app.get("/", (req, res) => {
  res.send("Welcome USER! to MY nodejs app!");
  console.log("welcome url /");
});

app.get("/delete", (req, res) => {
  res.send("User was deleted");
  console.log("DELETE user");
});

app.get("/create", (req, res) => {
  res.send("User was created!!");
  console.log("CREATE user");
});
To test it locally first just run with:
node index.js
and the application should run on port 3000.
Dockerizing
One of the first steps to get into Kubernetes is to have a runnable docker image for our application. So I created a Dockerfile that uses node-alpine image to keep the image small.
FROM node:12-alpine
WORKDIR /app
COPY package.json /app
RUN npm install
COPY . /app
CMD node index.js
EXPOSE 3000
To Build the image we can just run from inside the project dir/:
docker build -t mynode-app .
To Test the image locally run:
docker run -p 3000:3000 -d mynode-app
To Push the image to docker registry, for this demo I used my free docker hub registry. Login to docker registry with your username and password for docker hub and then you can push it through command line with :
docker push matharoo89/mynode-app
The image for the tutorial is public and can be found at : https://hub.docker.com/repository/docker/matharoo89/mynode-app
Kubernetes Setup
First we need to setup a minikube cluster which is easy to setup with just one command:
minikube start --vm=true --cpus 4 --memory 4098
Note the --vm=true flag, it is required on MacOS at the time of writing in order for us to enable the ingress addon later.
I have setup the project in its own namespace nodejs. To create a namespace just run:
```kubectl create namespace nodejs`
mynode-deployment.yaml
Now in order to deploy the pods I have created a deployment yaml which is divided into two main components that we see here:
- metadata : specifying the labels associated with our pod
- spec : specifying the number of replicas of pods to run which I have set to
2and then a template section where we define the image to be deployed to the pods by matching the app labels. - status ( only shown after deployment and can be see when we run
kubectl describe deployment mynode-app -n nodejs)
Before we deploy the pods we also need to ensure that our Kubernetes cluster is able to talk to the docker registry and download the image. For this we have to setup a secret called mycreds in the same namespace nodejs.
kubectl create secret docker-registry mycreds --docker-username=myuser --docker-password=mypwd --docker-email=matharoo89@gmail.com -o yaml > docker-secret.yaml
This command will give out docker-secret.yaml which we can apply by running:
kubectl apply -f docker-secret.yaml -n nodejs
Deploying our deployment.yaml
kubectl apply -f mynode-deployment.yaml
Output: service/mynode-app created
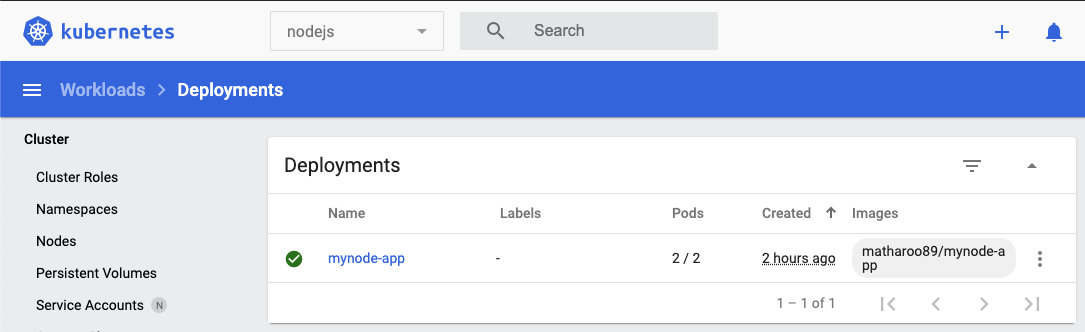
In order to get a better GUI view of whats happening inside the cluster we can run
minikube dashboard
this will open up the kubernetes dashboard and we can browse into deployments, services and many other componnets of our cluster.
mynode-service.yaml
Now in order to make our deployment pods discoverable internally/extrernally and send traffic to them some we need to expose them by creating a service. The service is usually of two types Nodeport and LoadBalancer. With nodeport we can expose our deployment at specified ports. With Loadbalancer there is no need to specify the ports as it will automaticaly take care of distributing the traffic hitting it to pods.
Now for example if the pods went down due to a node crashing or any other reaosn then when new pods come online they will have new IP addresses, if there was no service the traffic hitting our service will be seeing errors as the old pods doesnt exist. So thats where exposing our deployments with services come to rescue.
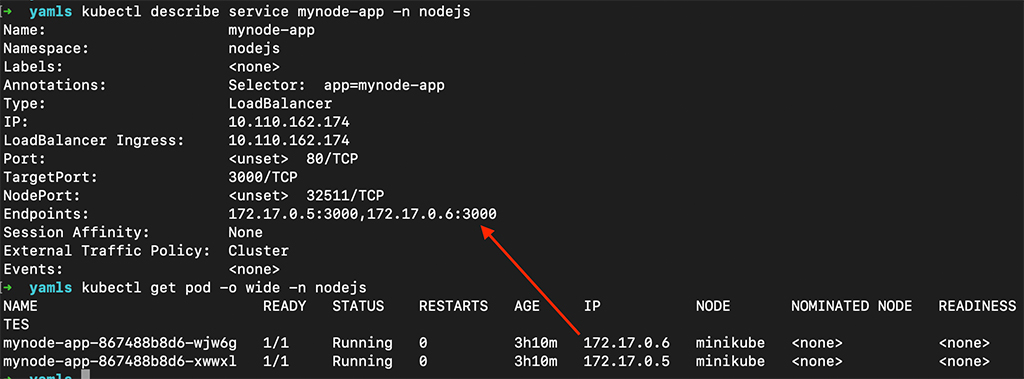
With the matching labels to the app the service can then auto discover any pods internally wth their IPs with the associate ports in the deployment and then when we hit the service endpoint it redirects us to the pods. Now as we keep adding new pods or removing the older the pods the service will automatically keep on adding new ips to the endpoints under our described services.
Deploying our mynode-service.yaml
kubectl apply -f mynode-service.yaml
Output: deployment.apps/mynode-app created
Emulating a LoadBalancer locally with minikube
In the example I have described a LoadBalancer service which usually needs an external load balancer to be setup but Minikube allows us to emulate a loadbalancer with a simple command:
minikube tunnel
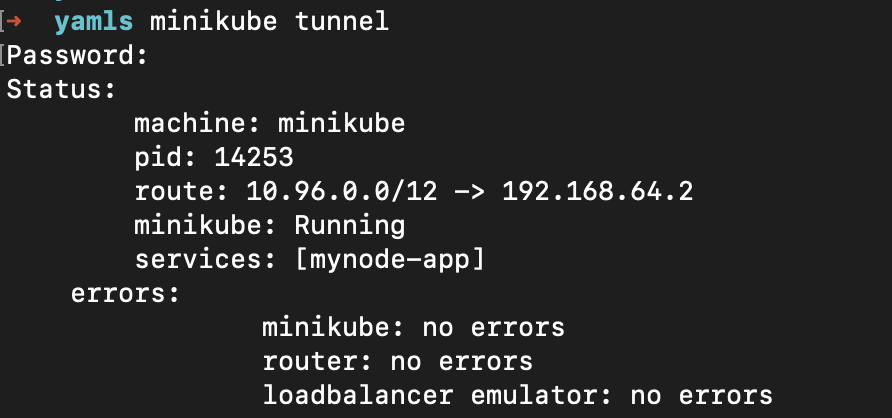
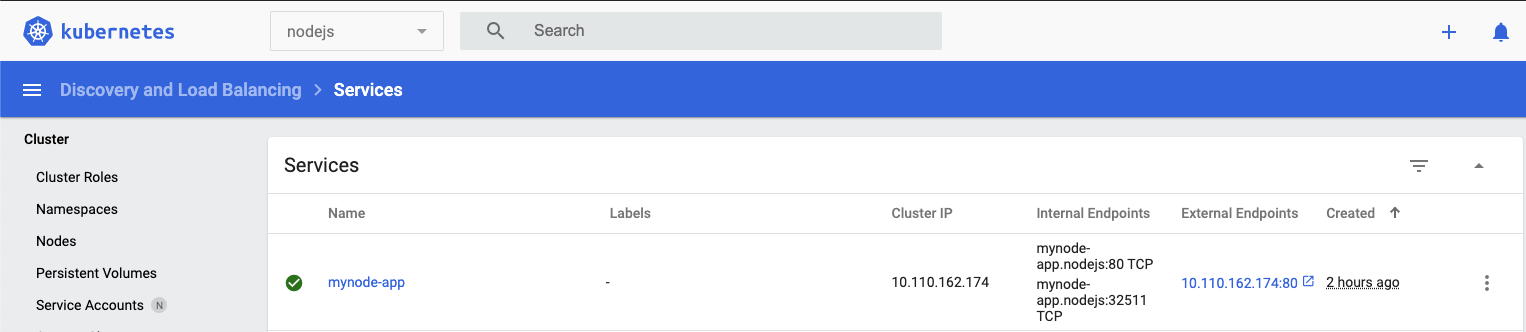
Now if we run:
kubectl get svc -n nodejs
it will show us that there is an external IP assigned which we can go to in browser that will open our app.
mynode-ingress.yaml
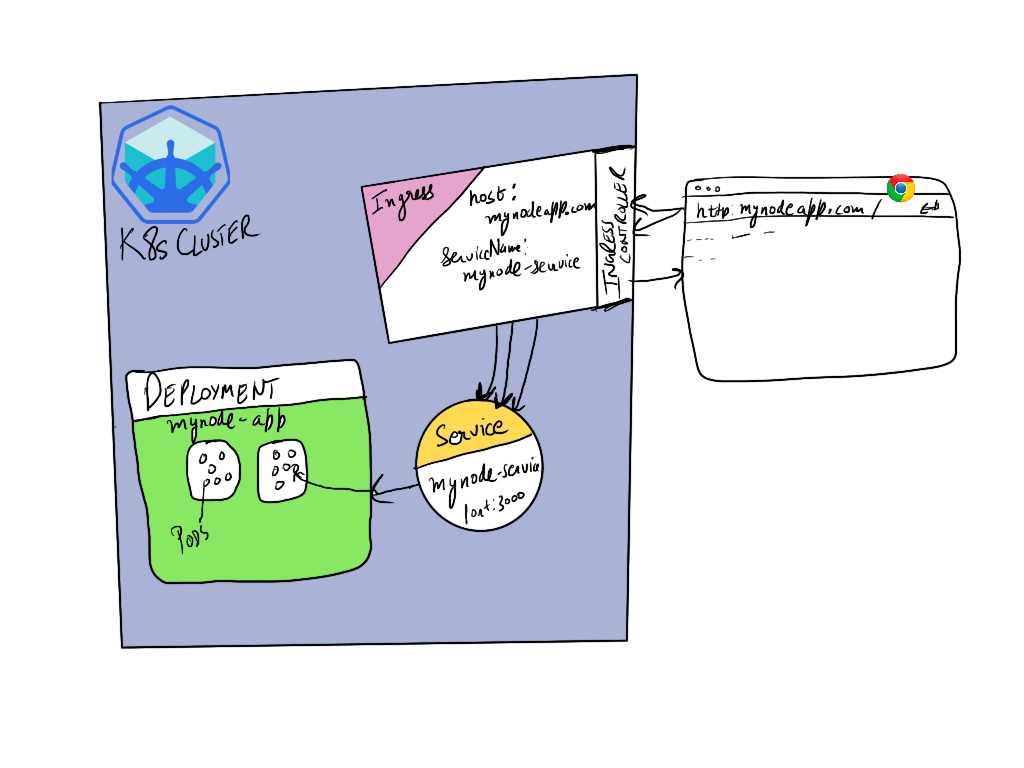
The ingress is our last piece to the puzzle of finally getting the hostname mynodeapp.com to work with our app. Since we have a service already setup that is forwardin the traffic to the deployment pods, the ingress is the layer above the service. When ingress is deployed, an ingress-controller pod is setup which gets the traffic and then sends it to service. So ingress acts one single entry point to our cluster which then routes to different services based on paths we
specify in our ingress.yaml.
Deploying our mynode-ingress.yaml
kubectl apply -f mynode-ingress.yaml
Output: ingress.networking.k8s.io/mynode-ingress created

kubectl get ingress -n nodejs

NAME             CLASS    HOSTS           ADDRESS        PORTS   AGE
mynode-ingress   <none>   mynodeapp.com   192.168.64.2   80      58s
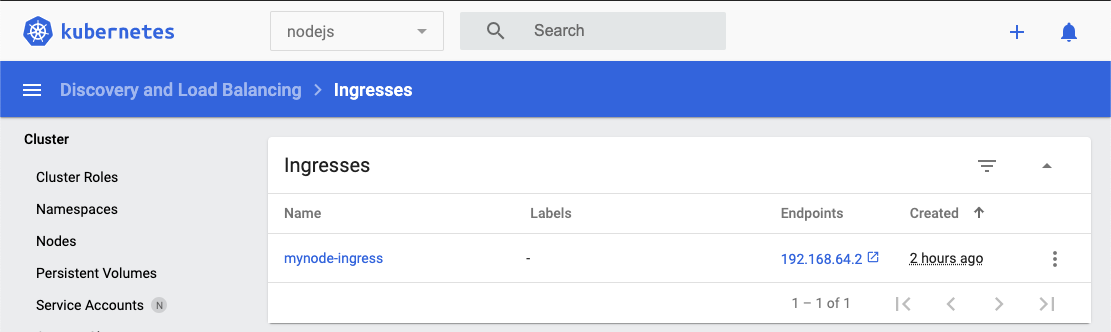
When we do a get on ingress we just deployed above, we get an ADDRESS which is 192.168.64.2 in my case. Now all we need to do is edit our /etc/hosts file and add the entry 192.168.64.2 mynodeapp.com.
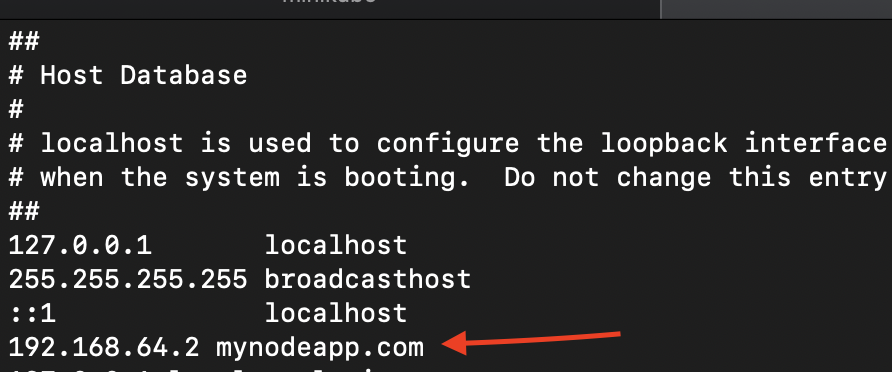
Now open browser and try going to mynodeapp.com it should take us to our app on our local cluster.